Suunto Blog

Heart Rate Zones: How to Train Smarter, Not Harder

Heart Rate Zones: How to Train Smarter, Not Harder

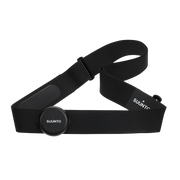
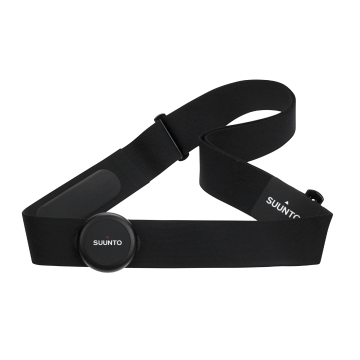
Exercise is more than just giving it your all. Overexertion can leave you exhausted, while too little effort can stall your progress. Heart rate zones provide balance, guiding you to train at the right intensity. They help you burn fat, boost stamina, improve speed, and lower your risk of injury, making every workout truly effective. Here, we will provide you with complete knowledge that explains what heart rate zones are, how to find yours, and tips to avoid mistakes. Let's get started and make your training smarter! Part 1. Understanding Heart Rate Zones Heart rate refers to the number of times your heart beats per minute (BPM), indicating how hard you're working during exercise.Tracking heart rate is important because, according to Forbes, "it can indicate level of physical fitness, health status, and can even signal potential health issues." Each heart zone represents a percentage of your maximal heart rate (MHR)—the highest rate your heart can reach during intense activity. These zones help you train with a specific goal in mind, such as building endurance or increasing speed. Zone 1: 50%–60% of Max Heart Rate This zone involves very light exercise, such as gentle stretching or a leisurely walk. It’s ideal for cool-downs, as it helps improve blood flow and reduces the risk of injury. Athletes often use Zone 1 for physical and mental recovery during the same training session. Zone 2: 60%–70% of Max Heart Rate Zone 2 heart rate is commonly referred to as the fat-burning heart rate zone. In this zone, exercise mainly works best to make the body burn fat as an energy source, as well as enhancing basic aerobic endurance. An exercise such as a brisk walk falls within this zone. This zone is useful in building up aerobic fitness, which is extremely vital to the heart and overall well-being. Zone 3: 70%–80% of Max Heart Rate This zone makes you breathe deeply, and you can hardly speak in short sentences. Zone 3 is the epicentre when it comes to the betterment of heart health and muscle endurance. Moderate exercise, like steady-state running or moderate-intensity exercise classes, is included in this category. The area is especially useful when training to attend races such as half-marathons. Zone 4: 80%–90% of Max Heart Rate Training in zone 4 enhances speed, endurance, and metabolic efficiency to great levels. This zone includes the exercise done at the last part of your workout, such as sprinting at the end of long running. This degree of effort enables your body to become accustomed to building up the level of lactic acid so that you can push yourself harder and further. Zone 5: 90%–100% of Max Heart Rate This range is dedicated to maximum efforts, e.g., a sprint finish or high-level athlete performance testing. Zone 5 training focuses on anaerobic capacity and maximal strength. The high intensity is demanding, making it unsuitable for beginners, as it strains both the cardiovascular and muscular systems. Proper guidance and adequate rest are essential for those attempting this zone. Part 2. What Is a Good Heart Rate Range for My Age? Your maximum heart rate (MHR) decreases with age, and knowing your MHR helps define your heart rate zones. You can use a simple formula to estimate your MHR: MHR = 220 - Your Age For example, a 30-year-old has an estimated MHR is: 220 – 30 = 190BPM Here's an age-based example table showing the five heart rate zones for different age groups: Age Zone 1  (50-60%) Zone 2 (60-70%) Zone 3 (70-80%) Zone 4 (80-90%) Zone 5 (90-100%) 25 98–118 118–137 137–157 157–176 176–195 35 93–111 111–130 130–148 148–167 167–185 45 88–106 106–123 123–141 141–159 159–176 55 83–101 101–114 114–132 132–151 151–170   Part 3. Resting Heart Rate Zones Chart Resting heart rate is the number of times your heart beats per minute when you are at rest or not doing any physical activity. Your resting heart rate (RHR) can reveal a lot about your overall fitness. A lower RHR often indicates better cardiovascular health as the heart works more efficiently. However, an RHR that is too low or too high may signal underlying health issues: Below 60 bpm: Common in athletes, signaling strong heart efficiency. In non-athletes, very low RHR (below 40 bpm) may indicate bradycardia, requiring medical advice if symptomatic (dizziness, fatigue). Normal (60–80 bpm): Reflects good heart health. High (above 100 bpm): May suggest stress, poor fitness, or health issues like hyperthyroidism or anemia. Therefore, it is necessary to regularly track your RHR over time. A consistent increase in your RHR, even within the normal range, could indicate a need to adjust your lifestyle or seek medical advice. Factors Affecting RHR: Fitness Level: More physically fit individuals tend to have lower RHRs. Age: RHR tends to decrease with age, but it can also be affected by overall health. Stress and Anxiety: Mental and emotional stress can temporarily elevate RHR. Medications: Some medications can affect heart rate. Health Conditions: Certain conditions, like infections, heart problems, and thyroid issues, can impact RHR. A general resting heart rate zones chart to assess your fitness level based on RHR: Fitness Level Resting Heart Rate (RHR in bpm) Excellent 50–60 Good 61–70 Average 71–80 Below Average 81–90 Poor 91+   Part 4. How to Calculate Your Heart Rate Zones Heart rate zones guide your workouts by targeting specific intensities for goals like endurance, fat burning, or speed. Here’s a streamlined step-by-step guide to calculate them, enhanced by using a high-quality heart rate monitoring tool for precision. 1. Measure Your Heart Rate Accurately A premium heart rate monitor, such as the Suunto Smart Heart Rate Belt, delivers medical-grade accuracy for serious training and professional athletic performance. This advanced heart rate belt technology provides unmatched reliability for athletes, runners, and fitness enthusiasts who demand precise cardiovascular data: Provides precise heart rate data with all-day comfort. Measures reliably during sports that disrupt wrist sensors. Stores heart rate data when the watch is out of range. Connects with the Sports Tracker app on Android, iOS, and watchOS. Offers waterproof protection and delivers 500 hours of battery life. 2. Find Your Maximum Heart Rate (Max HR) Estimate your Max HR with the formula: 220 minus your age (e.g., a 30-year-old’s Max HR is190 bpm). For better accuracy, wear Smart Belt during a supervised max effort test (e.g., a sprint or cycling session) to capture your true Max HR, ideally with a coach’s guidance. 3. Calculate Your Training Zones Once you have Max HR, let your watch or training app calculate automatically, or do it manually: Zone X lower bound=Max HR×lower percentage Zone X upper bound=Max HR×upper percentage Example: Max HR = 190 bpm, Zone 2 (60–70%) 190×0.6=114 bpm 190×0.7=133 bpm Then in this case zone 2 is 114–133 bpm. Once you have your five zone numbers, you can align your training zones with your goals: Zone 1 (50–60%): Light effort for recovery or warm-ups (e.g., 95–114 bpm for a 190 Max HR). Zone 2 (60–70%): Moderate effort for endurance and fat burning (114–133 bpm). Zone 3 (70–80%): Aerobic zone for cardiovascular fitness (133–152 bpm). Zone 4 (80–90%): High intensity for speed and stamina (152–171 bpm). Zone 5 (90–100%): Maximum effort for short, intense bursts (171–190 bpm). Part 5. Common Mistakes in Heart Rate Zone Training Training based on heart rate isn't foolproof. Here are common mistakes to avoid and how to fix them: Using an Inaccurate Max HR: Relying only on 220-age formula, which may be off by 10–20 bpm. Skipping Warm-Ups/Cool-Downs: Jumping into high zones or skipping recovery, stressing the heart. Training in the Wrong Zone: Mismatching zones with goals, causing overtraining or slow progress. Ignoring External Factors: Overlooking stress, dehydration, or heat, which skew heart rate data. Improper Device Use: Wearing the Smart Heart Rate Belt too loosely or neglecting maintenance, leading to inaccurate readings. Ignoring Body Signals: Following zones rigidly while ignoring fatigue or discomfort. Not Updating Zones: Using outdated zones as fitness or age changes, reducing training effectiveness. Final Thoughts Learning to understand the different heart rate zones and how to avoid the most common training errors in those different zones is a sure way to achieve the fitness objectives you set for yourself. The proper advice and equipment are important when it comes to achieving goals such as fat burning or strength gain. At Suunto, you will find everything that keeps you on track towards your goals, including a wide range of fitness products, such as heart rate belts and performance-tracking sports watches. 
SuuntoAdventure,SuuntoRunAugust 20 2025
How to Run Faster: Proven Strategies to Boost Your Speed

How to Run Faster: Proven Strategies to Boost Your Speed

You're running the same pace you were six months ago. Sound familiar? Most runners hit this wall because they focus on logging miles instead of training smart. The difference between fast runners and everyone else? They train their bodies to move efficiently at higher speeds — not just farther distances. We'll show you exactly how to break through your speed plateau using methods that transform everyday runners into faster athletes. Here's what you'll learn: Why speed matters (beyond just race times) The science behind what controls your pace Specific workouts and form fixes to run faster How to track progress with tools like the Suunto Run sports watch Speed myths that are holding you back Ready to leave your old pace in the dust? Let's make those legs move. Time to build some serious speed. Part 1. Why Running Speed Matters? Speed isn't just about winning races or chasing PRs. It's about transforming your entire running experience. When you run faster, you build stronger bones and tendons. Your body produces more mitochondria — those tiny powerhouses in your cells that generate energy. You develop better neuromuscular coordination, which means your brain and muscles communicate more efficiently. Even at slower paces. Here's what faster running does for you: Burns more calories in less time (a 30-minute tempo run torches more than a 45-minute jog) Strengthens your heart more effectively through higher-intensity cardiovascular stress Reduces injury risk by improving running economy and form Makes easy runs feel easier because your body adapts to harder efforts Builds type II muscle fibers that give you that explosive kick When you can run a 7-minute mile comfortably, an 8-minute pace feels like a breeze. You're not just getting faster — you're expanding your entire performance range. Speed work also triggers EPOC (excess post-exercise oxygen consumption). Your body keeps burning calories at an elevated rate for hours after your workout ends. More results, less time pounding pavement. Part 2. What Affects Running Speed? Your running speed boils down to a simple equation: stride length × stride frequency = speed. But what controls these two factors? More than you might think. VO2 max determines how much oxygen your muscles can use. Elite runners process about 70-80 ml/kg/min, while recreational runners hover around 35-45. The good news? You can boost yours by 15-20% with proper training. Lactate threshold is your speed limit before lactic acid floods your muscles. It's that burning sensation that forces you to slow down. Most runners hit this wall at 80-85% of their max heart rate. Running economy measures how efficiently you use oxygen at a given pace. Two runners with identical VO2 max levels can have wildly different speeds. Why? One wastes less energy through better form and biomechanics. Other speed factors include: Muscle fiber composition (fast-twitch vs. slow-twitch ratio) Body weight and power-to-weight ratio Flexibility and mobility in the hips and ankles Core strength for maintaining form Mental toughness when discomfort kicks in Part 3. How Can I Get Faster at Running? Let's get straight to all the tips to run faster. 1. Interval Training Run hard for short bursts, then recover. Start with 6 × 400m at 5K pace with 90-second recovery jogs. Week by week, either add more reps or cut recovery time by 15 seconds. Never both at once. Track workouts should leave you tired but not destroyed. 2. Tempo Runs Hold a "comfortably hard" pace for 20-40 minutes. You should be able to speak in short sentences — not full conversations. Find your tempo pace by adding 25-30 seconds per mile to your 5K race pace. Do these once weekly, preferably midweek when you're fresh. 3. Hill Sprints Find a 6-8% grade hill. Sprint up for 10-12 seconds at 95% effort. Walk back down for full recovery. Start with 4 reps, add one rep weekly until you hit 8-10. These build power without the joint stress of flat sprints. 4. Fartlek Training Swedish for "speed play" — mix fast and slow running however you want. Try this: During a 30-minute run, surge hard for 30 seconds every 3 minutes. Or use landmarks: sprint to the next mailbox, jog to the stop sign, repeat. Keep it unstructured and fun. 5. Running Form Improvement Cadence: Aim for 170-180 steps per minute. Count your right foot strikes for 30 seconds and multiply by 4 Posture: Lean slightly forward from the ankles, not the waist Foot strike: Land under your hips, not out front Arms: Elbows at 90°, hands relaxed, drive backward, not across your body Film yourself from the side. Most form issues become obvious immediately. 6. Strength Training Focus on explosive movements twice weekly: Box jumps (3 sets of 8) Single-leg deadlifts (3 sets of 12 each) Bulgarian split squats (3 sets of 10 each) Plank variations (3 × 45-60 seconds) Power comes from your glutes and core, not just your legs. Strong muscles = faster turnover. 7. Plyometrics Add these after easy runs: Bounding: Exaggerated running for 30 meters High knees: 3 × 20 seconds Butt kicks: 3 × 20 seconds A-skips: Focus on driving knee up, 3 × 30 meters Start with once weekly, build to twice. Your nervous system needs time to adapt. Part 4. How to Track Progress and Stay Motivated? You can't improve what you don't measure. Period. Tracking your runs transforms vague feelings of "getting faster" into concrete proof of progress. Key Metrics to Monitor: Average pace per mile/km for different run types Heart rate zones during intervals vs. easy runs Weekly mileage (increase by 10% max per week) Interval splits — are they getting faster or more consistent? Recovery heart rate — how quickly you bounce back post-workout Using the Suunto Run Sports Watch The Suunto Run sports watch packs serious tracking power into just 36 grams — so light you'll forget it's there. At only $249, it's built specifically for runners who want data without the bulk. What makes it perfect for speed training: Ghost Runner feature lets you race against your past performances Interval workout modes for structured speed sessions Dual-band GPS tracks your exact pace (no more "my watch says 7:15 but it felt like 6:45") 20-hour battery during training — enough for ultra distances Training Stress Score (TSS) tells you when to push and when to recover The watch syncs with the Suunto app for deeper analysis. You'll see trends, identify weaknesses, and know exactly when you're ready for harder efforts. Plus, it monitors sleep and recovery — crucial for speed gains. Pro tip: Use the music controls during tempo runs. Nothing kills momentum like fumbling with your phone mid-workout. Staying Motivated When Progress Slows Speed improvements aren't linear. You'll crush it for weeks, then plateau. That's normal. Beat the motivation dip: Set process goals, not just outcome goals ("I'll do intervals weekly" vs. "I'll run a 6-minute mile") Find a faster running partner once weekly — you'll push harder Sign up for a 5K every 6-8 weeks to test your fitness Track effort, not just pace (some days, 7:30 pace at 140 bpm is a win) Celebrate small victories — shaving 5 seconds off your tempo pace matters Remember: Every fast runner started exactly where you are. Part 5. Common Misconceptions About Getting Faster Here's the list of the most common misconceptions about getting faster: 1. "More Miles = More Speed" Wrong. Running 50 slow miles weekly won't make you faster than running 30 miles with structured speed work. Quality beats quantity every time. Studies show runners who replace just 20% of easy miles with intervals see bigger speed gains than high-mileage runners. 2. "Speed Work Should Leave You Wrecked" If you're crawling to your car post-workout, you went too hard. Speed sessions should feel challenging but controlled. You should finish knowing you had one more rep in the tank. Destroying yourself leads to overtraining, not adaptation. 3. "You Need Perfect Genetics" Sure, elite marathoners have genetic advantages. But you? You're competing against your previous self, not Kipchoge. Most recreational runners can drop their 5K time by 2-3 minutes through proper training. That's genetics-proof improvement. 4. "Stretching Makes You Faster" Static stretching before runs actually decreases power output by up to 8%. Save those long holds for after your run. Dynamic warmups — leg swings, high knees, butt kicks — prep your muscles for speed. Movement beats stretching. 5. "You Should Run Through Pain" "No pain, no gain" is terrible advice for runners. Sharp pain, pain that worsens during runs, or pain lasting over 72 hours? Stop and address it. The fastest way to lose speed? Getting injured and spending six weeks on the couch. 6. "Breathing Patterns Are Critical" Forget counting breaths. Your body knows how to breathe. Focus on relaxed shoulders and good posture — oxygen delivery handles itself. The only breathing rule? If you're gasping during easy runs, slow down. Ready to Track Your Speed Journey With Suunto Run? Getting faster isn't about grinding endless miles or complicated training plans. It's about training smart, measuring progress, and giving your body time to adapt. You now have everything you need to break through that speed plateau. Your next PR is waiting. Whether you're chasing a sub-20 5K or just want to feel less winded on morning runs, consistent speed work will get you there. Start with one interval session weekly, build gradually, and watch those minutes drop off your times. Fast is learnable.
SuuntoRunAugust 19 2025
Expert 5K Running Plan for Beginners

Expert 5K Running Plan for Beginners

Want to cross a 5K finish line with a smile on your face and a medal swinging around your neck? A 5K run is short but achievable. It is challenging enough to make you feel unstoppable. For many beginners, the 5K is the perfect gateway into the running world. You do not need endless hours of training. It all depends on your endurance, pacing, and mental grit. With the right plan, you can go from couch to confident runner in just a few weeks. This guide includes a 5K running plan for beginners. We will provide a proven running schedule for 5K beginners and essential tips for running a 5K. So you can finish strong and prove yourself on the race day. Part 1. 5K Running Basics A 5K is a short 5-kilometre run. The distance is equal to 3.1 miles. It can be continuous running or a mix of running and walking if you are just starting. For many beginners, it is the perfect first race distance. It is long enough to be a challenge and also short enough to train for in just a couple of months. Perfect for beginners and experienced alike. For marathons, you need months of high mileage. But a 5K is just about building aerobic endurance, proper running form, and race pacing. Why Start with a 5K? Quick preparation: You can train for a 5K in just 6–8 weeks with 3–4 runs per week, unlike a half-marathon, which needs 12–16 weeks. Low gear requirement: All you need is a good pair of running shoes and comfortable clothing. Not like trail or marathon running, which demand specialized shoes, hydration packs, and layered gear. Beginner-friendly pace: Mostly 5K races welcome walkers, so you can ease into the sport without pressure to only run, unlike competitive 10Ks or marathons, where cut-off times are stricter. Part 2. What's the Average 5K Times by Age Your finishing time depends on your fitness level, age, sex, and running experience. In order to complete the distance, most beginners ignore the speed. But it is useful to know where you stand. General Average 5K Finish Times by Age  Age Group Men (Fastest – Slowest) Women (Fastest – Slowest) Under 20 20:00 - 31:28 26:00 - 38:38 20-29 20:30 - 33:19 26:30 - 38:44 30-39 21:00 - 34:36 27:00 - 40:13 40-49   21:30 - 35:24 27:30 - 41:40 50-59 22:30 - 36:34 28:30 - 43:57 60+  25:00 - 40:42   31:00 - 48:41   Young runners have a faster average due to higher cardiovascular capacity. Experience trumps age; a 50-year-old who trains consistently can easily outrun an untrained 25-year-old. Beginners can finish anywhere between 30-45 minutes, especially in their first race. When you track your runs during training, do not compare yourself harshly to these averages. Instead, use them to measure your improvement over time. Part 3. 5K Running Plan for Beginners This 5K running plan works even if you are struggling to run for more than a minute at a time. It is designed around short, manageable sessions. It can fit easily into a busy week, around 30 minutes per workout. And if you prefer walking or a mix of running and walking, you can still follow the plan and cross the finish line with confidence. Before starting the schedule, set yourself up for success: Mark race day on your calendar so you have a clear target date. Block out training times as you do for appointments or meetings. Start at your current fitness level. If you can not yet run for 30 minutes, begin with brisk walks or shorter run-walk intervals until you can. If you are new to exercise, begin with gentle sessions. Spread several short walks throughout the day to build stamina. Once you can sustain 30 minutes of activity, you are ready to begin the full plan. For reference, health experts recommend at least 150 minutes of moderate aerobic activity or 75 minutes of vigorous activity per week. This training plan aligns closely with those guidelines. Also, add built-in recovery days to keep you injury-free. How the Plan Works This seven-week schedule combines running, walking, and rest days. This will help build endurance, reduce fatigue, and injury risk. Beginners and runners can adopt it. A key element of this plan is the Magic Mile. It is a short, timed effort that helps you estimate your ideal 5K race pace. You will do it twice during the program to track progress. 7-Week 5K Training Schedule for Beginners Week Mon Tue Wed Thurs Fri Sat Sun 1 Run 15s / Walk 45s - 30 min Walk 30 min Run 15s / Walk 45s - 30 min Walk 30 min Rest Run/Walk 3 mi Rest or Walk 2 Same as Week 1 Walk 30 min Same as Week 1 Walk 30 min Rest Run/Walk 3.5 mi Rest or Walk 3 Run 20s / Walk 40s - 30 min Walk 30 min Run 20s / Walk 40s - 30 min Walk 30 min Rest Run/Walk 2 mi + Magic Mile Rest or Walk 4 Same as Week 3 Walk 30 min Same as Week 3 Walk 30 min Rest Run/Walk 4 mi Rest or Walk 5 Run 25s / Walk 35s - 30 min Walk 30 min Run 25s / Walk 35s - 30 min Walk 30 min Rest Run/Walk 2 mi + Magic Mile Rest or Walk 6 Same as Week 5 Walk 30 min Same as Week 5 Walk 30 min Rest Run/Walk 4.5 mi Rest or Walk 7 Run 30s / Walk 30s - 30 min Walk 30 min Run 30s / Walk 30s - 30 min Walk 30 min Rest Race Day - 5K Rest or Walk   These short, focused training sessions are manageable even for busy schedules. The gradual progression minimizes the risks of injuries. Run-walk intervals help beginners build stamina without burning out. To add more precision, consider using a sports watch like the Sunto Run. As a watch designed for runners, it not only tracks your pace, heart rate, and distance in real time it also delivers advanced running metrics such as cadence, recovery time, and route navigation.  Unlike other sports watches that drain quickly, Suunto Run sports watch offers exceptional battery life that lasts up to 12 days of regular use. Its durable, weather-resistant design performs well in rain, heat, or cold. With precise GPS tracking and intuitive controls, it helps you stay consistent. By getting such a premium watch, you can avoid starting too fast and make data-driven improvements that accelerate your progress. Part 4. Practical Tips for Running a 5K When the training is done, the race day is all about execution. Follow these tips to make your first 5K a positive experience. 1. Perfect Your Warm-Up Routine Your muscles need to be ready. So start with 5-10 minutes of light jogging followed by dynamic stretches like high knees, butt kicks, and leg swings. These movements loosen joints and boost blood circulation. It primes your muscles for a quicker and smoother start. 2. Pace Yourself from the Start The excitement at the starting line can trick you into burning too much energy early. Resist the urge to sprint with the crowd. Stick to your planned pace for at least the first 2 miles. Use a GPS watch or running app to stay on track. Remember, a steady pace early often leads to a faster overall time. 3. Fuel and Hydrate Smartly For a 5K, less is more. You do not need mid-race snacks. But hydration matters most before the race starts. So, drink water steadily throughout the day before your run. On race day, have your last big drink 1-2 hours before the start to avoid stomach discomfort. Sip small amounts about 15 minutes before you line up. If it is hot, a sports drink with electrolytes can help you avoid dehydration without weighing you down. 4. Dress for Comfort What you wear can make or break your race-day comfort. Choose fabrics that wick away sweat. Avoid cotton because it holds moisture and can cause irritation. In cooler weather, layer lightweight, breathable clothing that you can easily remove as you warm up. In warmer conditions, opt for moisture-wicking shorts, a breathable singlet, and a hat or sunglasses to protect against the sun. Final Thoughts Training for your first 5K is much a mental and physical journey. Follow a structured 5K running plan and understand average 5K times by age to set yourself up for success. For a 5K run, consistency and patience are your most powerful tools. To optimize your run, invest in the right gear like a Suunto Run sports watch and run with a plan. Your first 5K will be just the start of your running journey.
SuuntoRunAugust 13 2025
How to Speed up Healing of Pulled Muscles

How to Speed up Healing of Pulled Muscles | A Comprehensive Guide

During the exercise, running, lifting something heavy, or even just moving fast, pulling a muscle is quite common. This may seem common, but it can cause a lot of pain and stop you from doing daily activities. But don't worry, as there are some easy ways to help your body heal faster. Wondering how? We have got you covered. In this article, we will dive deep into how to speed up healing of pulled muscles in simple steps. Besides this, we will learn what causes muscle strain, and you can avoid it in the future. So let's get started. Content Table: Part 1: What is Muscle Strain? Part 2: Why My Muscles Get Pulled? Part 3: How to Speed up Healing of Pulled Muscles? Part 4: How Long Does It Take to Recover from the Muscle Strain? Part 5: How to Avoid Muscle Strain Again? Part 1: What is Muscle Strain? But let's first understand the basics. A muscle strain, also known as a pulled muscle, happens when your muscle stretches too much or tears. This can occur suddenly, like during a quick movement, or slowly over time due to overuse. When you strain a muscle, you may feel sudden pain, tightness, or weakness. Some people even notice bruising or swelling around the injured area, and this restricts movement in that area. It is because a muscle pull causes microscopic damage to muscle fibers. As a result, your body responds with: Vasodilation (blood vessels widen) to bring healing cells and nutrients. Increased permeability of capillaries allows fluid, white blood cells, and proteins to leak into the surrounding tissue. This leads to swelling (edema) and sometimes bruising. Generally, there are three different types of muscle strains Grade 1 (Mild): In Grade 1, the muscle is slightly stretched, and there may be mild pain but no major weakness. Grade 2 (Moderate): In Grade 2, the muscle has a partial tear. As a result, you'll feel more pain, swelling, and have trouble using the muscle. Grade 3 (Severe): In Grade 3, the muscle is fully torn. This is very painful and often needs medical treatment. Now that you understand what a muscle strain is, let's talk about what causes it in the first place. Part 2: Why My Muscles Get Pulled? Muscle strains can happen to anyone, and they often show up when you least expect them. But the real question is, what causes them? Here are some of the common reasons for pulled muscles: Overuse: Sometimes in sports or at work, if you use the same muscle too much, it gets tired and is more likely to get injured. Not Warming Up: Jumping into hard activity, such as running or working out at the gym, without warming up your muscles often results in muscle strain. Poor Flexibility: As stiff muscles can't stretch properly, they're easier to pull. Sudden Movements: Sudden movements such as quick turns or jumps can cause your muscles to tear. Lifting Heavy Things Wrong: If you lift something heavy without using the right technique, your muscles can strain. Old Injuries: If you've strained a muscle before, it's easier to hurt that area again. Cold Weather: Muscles tend to tighten up in the cold, which makes them easier to pull. Part 3: How to Speed up Healing of Pulled Muscles? Like we said earlier, pulling up a muscle is quite common, but the good news is, most mild to moderate strains can heal at home. But still, how do you make it heal faster? To speed up the healing of pulled muscles, follow these tips: 1. Use the R.I.C.E. Method This is the first thing you should do right after a muscle gets hurt. Rest: Don't use the injured muscle. Avoid activities that make it hurt more. Rest allows the muscle fibers to repair. Ice: Wrap an ice pack in a towel and place it on the sore spot for 15–20 minutes. Do this every few hours during the first two days. Ice brings down swelling and reduces pain. Compression: Use an elastic bandage to wrap the area. This helps keep swelling down. Elevation: Raise the injured part above your heart level if possible. This way, you are actually using gravity to reduce fluid buildup, lower pressure, and promote speedy recovery. Doing R.I.C.E. in the first 48 hours is one of the smartest ways to start healing. 2. Stay Gently Active While complete rest is important for the first couple of days, lying down too much can cause muscle stiffness. So, after two or three days, if you start feeling the improvement, try light stretching and gentle movement. For example, if you pulled your leg muscle, try slowly bending and straightening your leg. Just be careful and if it hurts, stop. Gradual movement helps prevent stiffness and keeps the muscle from getting weak. However, avoid full workouts or heavy lifting until your strength returns. 3. Do a Gentle Massage After a muscle strain, you might feel tight knots in the muscle. Therefore, a soft massage around the injured area can be really helpful. It is because a soft massage can improve blood flow and reduce tension. You can do it by using your fingertips or a foam roller to apply light pressure. Never press too hard, especially if the area is swollen. 4. Switch to Heat After 2–3 Days Once swelling is gone, usually after 48 hours, switch from ice to heat. You can try a warm compress, hot towel, or heating pad as they can loosen the muscle and increase circulation. Apply heat for 15–20 minutes, especially before doing gentle stretches. 5. Eat Foods That Support Muscle Recovery Believe it or not, your plate can speed up your healing process. Certain foods give your body the nutrients it needs to rebuild damaged muscle fibers. Therefore, in muscle recovery, try foods like: Protein-rich: Like eggs, chicken, beans, and tofu. Fruits and veggies: Especially leafy greens, oranges, and berries. These reduce inflammation and help your body fight damage. Healthy fats: Found in nuts, seeds, and avocados. These support tissue healing. Stay Hydrated: Drink more water, as muscles need water to recover and function properly. Additionally, you can take natural supplements like magnesium or omega-3s. But make sure to only take it if your doctor approves. 6. Take Anti-Inflammatory Creams or Medicine Over-the-counter pain creams or medicines like ibuprofen can reduce swelling and help with pain. But remember, these medicines don't heal the muscle; they just mask the pain. But still, use them wisely and don't overuse them. Also, always follow the directions on the label. 7. Do Simple Recovery Exercises Once the pain has lowered after a few days to a week, start simple exercises to make your muscles stronger again. Focus on stretching and strengthening, but go slow. It is important because it will not only help you heal but also prevent another strain from happening. Here are a few safe examples: Gentle stretches for the injured muscle group Low-impact movements like walking or light yoga Resistance bands to rebuild strength once you're ready   Note: While most muscle strains heal on their own, you should see a doctor if: The pain is severe or doesn't get better after a few days You can't move the muscle at all You feel numbness or tingling. You hear a popping sound when it happens There's heavy swelling or bruising You have a fever or signs of infection. In these cases, a doctor might suggest physical therapy, stronger medication, or even imaging like an MRI. So, if something feels off, don't guess, get it checked.     Part 4: How Long Does It Take to Recover from the Muscle Strain? Usually, the recovery of muscle strain depends few things, such as how serious the strain is, your age, your overall health, and how well you care for the injury. But here's a general idea based on the type of muscle strain: Grade 1 (Mild strain) What it is: A few muscle fibers are overstretched, but the muscle is still mostly fine. How long it takes: Usually 1–2 weeks. What you can expect: You might feel some pain when using the muscle, but basic activities are still possible. With rest and proper care, it heals fairly quickly. Grade 2 (Moderate strain) What it is: A larger portion of the muscle is torn. How long it takes: Usually 3–6 weeks. What you can expect: You'll likely feel more pain, swelling, and weakness. Using the muscle might be difficult, and you may need to take a break from work or sports. Grade 3 (Severe strain) What it is: The muscle is completely torn or ripped away from the tendon. How long it takes: Several months or longer. What you can expect: This is a serious injury and often needs surgery or physical therapy. It may take 3–6 months, or even longer, to fully recover. Everyone's body is different, so some people heal faster than others. Also, age, health, and how well you follow the treatment plan matter a lot. Part 5: How to Avoid Muscle Strain Again? No one wants to get hurt again, right? Here's how to keep yourself safe and prevent your muscles from future injury: Warm Up Properly: Before doing any physical activity, spend 5–10 minutes warming up. Walk, stretch, or do light movements to prepare your body. Stretch Every Day: Stretching makes your muscles more flexible and less likely to get pulled. You can stretch after waking up, before bed, or after workouts. Stay Active: Exercise regularly to keep your muscles strong. Strong muscles are harder to injure. Lift Things the Right Way: Bend your knees, keep your back straight, and lift with your legs, not your back. Stay Hydrated and Eat Well: Your muscles work better and recover faster when your body is healthy. Listen to Your Body: If something feels wrong, don't push it. Pain is a signal that your body needs rest. Wear the Right Shoes: If you're walking or exercising a lot, wearing proper shoes can support your body and prevent injuries. Monitor Recovery: You can use a smartwatche like Suunto Run to know when your muscles have recovered. They track things like resting heart rate, hrv, and sleep quality. By paying attention to these, you can avoid training too hard too soon and reduce the chance of pulling muscles again. Conclusion Pulled muscles are annoying and painful, but healing doesn't have to take forever. With the right care and a few simple steps, you can recover faster and feel better soon. Remember, knowing how to speed up healing of pulled muscles is the first step, but avoiding the injury again is just as important. So take care of your body, treat it kindly, and it'll reward you with strength and movement.
SuuntoRunAugust 12 2025
Know Your Resting and Max Heart Rate

Know Your Resting and Max Heart Rate

Keeping track of your heart rate is vital for endurance athletes. In this article Suunto partner PerfectPace explains the ins and outs. Knowing your max heart rate is an important guide for athletes. It gives you a roof for your training and indicates the level of intensity. On the other hand, one of the first signs of overtraining syndrome is an elevated resting heart rate. For endurance athletes doing high volume training this is essential to watch out for. Identifying your maximum and resting heart rate is vital for the calculation of training zones. Particularly for endurance training these numbers are very important and they are not hard to come to. But there are a few things to consider. How to Find Your Maximum Heart Rate You have probably heard of the formula 220 minus age to get your maximum heart rate. Some say that this formula is not too exact but all in all the results are ok. Unfortunately that is not the case. In most cases the result is way off. A Norwegian study on more than 3300 healthy women and men has tested their maximum heart rate. The graphic below shows the result. What we can see is that the average values for the whole population is on a straight line. But for most individuals their maximum heart rate is far from that line. The conclusion is that the formula works for the average global population but not for an individual. When looking at the graph it is also evident that no formula can calculate the individual maximum heart rate. The results are just too scattered. The only way to get to your max HR is via a test. Source: Age-predicted maximal heart rate in healthy subjects: The HUNT Fitness Study How to Test Your Maximum Heart Rate The maximum heart rate should be tested in your sport. Runners should run and swimmers swim. Triathletes should do a run test. The heart rate is the highest in running of all three sports. A max HR test is VERY demanding. You need to go to your limit and that will hurt. A typical test for runners looks like this: Warm up for at least 10 minutes. Now increase your tempo for 5 minutes until you get out of breath. This is the time to start a one minute spurt. It will hurt but you need to max out. Depending on your ability to push yourself you'll get close to your maximum heart rate. To make the most of this kind of intensity training, consider using the Suunto Run sports watch. Designed specifically for runners, it accurately tracks your heart rate—even during short bursts—and helps you understand how close you are to your maximum capacity. With dedicated running modes, recovery insights, and real-time pace and effort metrics, Suunto Run keeps you in tune with your body, so you can train smarter and go further. How to Find Your Resting Heart Rate Like for the maximum heart rate there is no formula to calculate your resting heart rate. The resting heart rate is even more individual than the maximum heart rate. Some sport watches like Sunnto Run can measure your pulse while sleeping. In the morning you will have your resting heart rate. If you don’t have such a device you can simply measure your heart rate right after you woke up. Untrained have a resting heart rate between 60-80 bpm. Endurance athletes might have only 35 bpm. The reason for such differences are adaptations to the cardiovascular system. The heart gets stronger and more efficient when under high load but also when resting. What Is a Normal Resting Heart Rate? For adults, a typical resting heart rate falls between 60 and 100 beats per minute. In general, a lower resting heart rate indicates a more efficient heart and stronger cardiovascular fitness. For instance, highly trained athletes often have resting heart rates as low as 40 beats per minute. Changes of the Maximum and Resting Heart Rate The heart rate changes during your lifetime. Simply by getting older. A new born baby has a resting heart rate of 130-140 and it drops with every year. This is the reason why the formula 220 minus age came up. But there are a lot more factors than just age that influence your heart rate all the time. Therefore you should test again from time to time to make sure your training zones match your physiology. But there are also short term changes in your heart rate. You won’t be able to reach your max heart rate every day. Also the resting HR is changing from day to day up to 15 beats per minute. reasons can be a cold or over training. By checking your resting heart rate regularly you can spot abnormal stress levels early and adapt your training. What Is a Dangerous Heart Rate? A dangerous heart rate refers to a resting heart rate that is abnormally high or low and may indicate an underlying health issue. However, context matters—well-conditioned athletes, for example, often have resting heart rates below 60 bpm, which can be perfectly healthy. Several factors influence whether a heart rate is dangerous, including age, fitness level, sex, medical history, and the use of certain medications. Symptoms such as dizziness, chest pain, shortness of breath, or fainting—especially when paired with an abnormal heart rate—may signal a serious problem and should prompt medical attention. Always consult a healthcare provider for heart rate concerns that seem unusual or are accompanied by other symptoms.   PerfectPace is the endurance training platform for triathletes that takes you a step ahead. For a steady performance gain you had to know a lot about training methodology to plan your training sessions. Especially in a sport like triathlon where three sports need to be planned correctly. This is where PerfectPace steps in. It offers not only unique statistics that up to now were only available in expensive desktop applications but it also helps to create a plan that boosts your performance with the help of artificial intelligence, big data and the latest advances in training science. PerfectPace considers not only your training activities but also rest days, tapering, even injury and your personal strengths and weaknesses. Read More Articles 10 Proper Running Techniques for Every Runner Expert Breathing Tips For Running
SuuntoRunAugust 06 2025
8 Tips to Start Working Out Again After Knee Injury

How to Start Working Out Again After a Knee Injury? (8 Tips)

Imagine this: you're working out or playing any sport, and just as you leap for a rebound, something twists in your knee. You hear a pop, and pain shoots through your leg. Days later, the doctor confirms what you feared: that it's a knee injury. The first question that will arise in your mind will be, Can I work out again? If so, how do I start safely?  Well, Knee injuries are among the most common issues athletes and fitness enthusiasts face. Whether it's a strained ligament, torn meniscus, or overuse, such injuries are very common and can significantly impact your ability to move, exercise, or even complete daily tasks. However, fortunately, recovering from a knee injury is not as difficult as some might presume. In this article, we will dive deep into how to start working out again after a knee injury through the best eight recovery tips. So let's get started: Content Table: 8 Tips to Start Working Out Again After Knee Injury Bonus Tip: Track Your Progress with the Suunto 9 Peak Pro Smartwatch 8 Tips to Start Working Out Again After Knee Injury Here are the 8 best tips to start working out again after the knee injury. These tips are professional, practical, and safe and aim to support your return to fitness in a careful, evidence-based way. 1) Adopt a Positive and Patient Mindset  First things first, stay positive and optimistic. Recovering from any injury, particularly a knee injury, isn't just about the body; it starts with the mind. A positive and patient mindset is your foundation for successful recovery. Therefore, it is important to understand the process and recognize that the recovery process will be gradual. There will be some bad days and good days. You can plan out by setting goals that are short-term but realistic. For example, walking pain-free for 10 minutes can be a big milestone. Celebrate those wins. Patience will allow your body the time it needs to rebuild, and a positive mindset will keep you motivated even when progress feels slow. Therefore, instead of focusing on what you can't do yet, focus on what you can. 2) Stay Connected with Your Fitness Community  Injury can sometimes lead to feelings of isolation. Especially if you're used to regular workouts or group training, feeling isolated during recovery is really common. However, staying in touch with your fitness community can be helpful, as it will provide emotional support and encouragement. So, during the recovery period, check in with workout buddies. You can consider joining virtual workout groups or participating in fitness forums where others share their recovery journey. It is important because even a light conversation about fitness can keep you engaged and inspired by reminding you that you are still part of the community. 3) Manage Your Weight to Reduce Joint Stress You know how important it is to maintain a healthy body weight, and it becomes even more important when you are recovering from injury. It is because extra weight can place additional stress on your injured knee, which can slow down the healing process. Contrary to this, effective weight management helps reduce inflammation and speeds up healing.  That's why it is important to manage your weight, and you can do it by making small changes in your diet. Focus on consuming a balanced diet rich in whole foods, including lean proteins, vegetables, fruits, and healthy fats. Besides this, try to avoid sugary or processed food, as they can cause inflammation. You don't need a strict diet plan; just be mindful of your choices. Moreover, if your healthcare provider permits, do gentle activities like swimming or stationary cycling to stay active without aggravating your injury. 4) Avoid Heavy Lifting and Deep Squats (Early On)  During the early stages of recovery, it is advisable to avoid heavy lifting and deep squats. It is because these movements exert significant pressure on the knee. So the question arises, what else can you do?  Instead of heavy lifting or squats, opt for light resistance exercises with slow and controlled movements. You can use resistance bands, bodyweight workouts, or lightweight dumbbells. In addition, you can also shorten your range of motion. For example, instead of going deep for full squats, you can do half squats. For better understanding, you can take services from a physical therapist or certified trainer, as they can provide personalized guidance and ensure proper form. 5) Focus on Core and Glute Strengthening  When recovering from a knee injury, it might sound strange to work on your abs and glutes. But these muscle groups are crucial. A strong core improves balance and stability, while strong glutes support your hips and knees during movement.  Therefore, focus on the muscles surrounding the knee by incorporating exercises like bridges, clamshells, side planks, and bird dogs in your routine. These movements will enhance overall posture and alignment by not putting pressure on your knee but still building strength in areas to protect it.  Remember, consistency is key here. At first, you can start doing 10-15 minutes of these strengthening workouts 3-4 times a week. You can gradually increase the intensity as your strength improves.   6) Rebuild Strength Gradually  Rebuilding strength gradually helps you avoid setbacks and ensures long-term success. Therefore, start with low-impact movements: walking, cycling, and basic bodyweight exercises, and increase the intensity or resistance only when your knee feels stable and pain-free. Also, make sure to monitor your progress. Track down what exercises you did, how long you worked out, and how your knee felt. Keeping a recovery journal can help you track improvements and identify any activities that may require adjustment.  7) Ease Back Into Workout Slowly  Returning to your workout routine should feel like a soft landing, not a crash. Therefore, carefully create a modified workout plan for your first few weeks back. Focus on low-impact activities like yoga, Pilates, swimming, or light elliptical sessions. It is because these options can provide cardiovascular benefits without overloading your joints. Try following the 10% rule: increase your workout duration or intensity by no more than 10% per week.   Remember, it's okay to take breaks. Listen to your body, and don't rush just because you're excited to get back into shape. 8) Listen to Your Body—Stop if There's Pain  This one is really crucial and might be the most important tip of all. Pain is your body's way of saying, "Slow down." While a little soreness can be normal, sharp or lingering pain is a red flag that you should never ignore. During an exercise, if you feel discomfort in your knee, stop immediately and evaluate your activity. Do not try to push through the pain, as doing so makes things worse. Also, always warm up before the exercise session and cool down afterwards. Gentle stretching and mobility work can support joint health and flexibility. Consult your physician if symptoms persist. Bonus Tip: Track Your Progress with the Suunto 9 Peak Pro Smartwatch As you are rebuilding your fitness routine, tracking your progress becomes essential. That's where the Suunto 9 Peak Pro Smart Watch comes in. This amazing smartwatch offers more than just timekeeping—it acts as your personal fitness assistant. With presets for over 95 sport modes, it's ready whether you're hitting the gym, walking in the park, or exploring the mountains.  Its advanced features include heart rate variability (HRV) monitoring, personalized feedback on training load, recovery status, and progress tracking. This ensures that each workout is both safe and effective for your current condition. You can follow your metrics through the Suunto app or sync them with coaching platforms like TrainingPeaks for a deeper analysis.  Conclusion Recovering from a knee injury and returning to physical activity requires diligence, patience, and thoughtful planning. By following these eight tips, you can safely navigate how to start working out again after a knee injury. The process is quite simple and straightforward. All you need to do is prioritize a positive mindset, maintain connections with your support network, focus on a healthy diet, and ease back into workouts with caution.
SuuntoRunAugust 06 2025