Suunto Blog
Three ways to navigate with a Suunto Spartan GPS watch
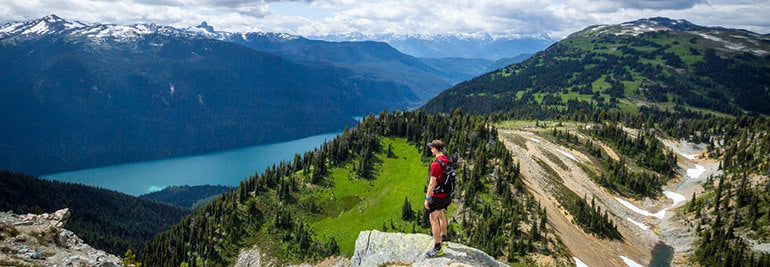
Jeff Pelletier, a trail runner and filmmaker from Vancouver, BC, Canada put together this great video with some tips for navigating with the Suunto Spartan. He showcases how you can navigate in new surroundings or challenging terrain using these three different features of the Spartan.
1. Routes
2. Compass
3. Breadcrumb
Watch the video now!
You are not limited to these three ways to navigate. You can also use POI navigation (read how this is done here). In addition, as of the Spartan update in June (1.9.36) you can now also use find back navigation which plots your quickest route back to your starting point utilizing the compass to guide you.
Main image by @jpelletier
Learn more about Suunto Spartan GPS watches
Can an e-Car support an epic ski adventure? 100%.
As a professional adventurer, I constantly search far and wide for new challenges and new spots to explore. My happiness, my inspiration… essentially everything that fulfills me comes from nature. But looking at how I access these adventures, it’s clear: I am killing the world as it stimulates me.
Not only was I well beyond the sustainable level, there was more that the test could not calculate. The heli-guiding, the snowmobile I used for access – these were not added to the thousands of kilometers driven in my F-350, or the multiple intercontinental flights. The truth was obvious: I needed to change my ways.
Immediately I decided to try something suggested by my brother Graham at his TED talk. I became a weekday vegetarian and got my family to join me. (It is amazing to think how much of an impact the global meat industry has!) A simple but very effective change. But for me, with my globe-trotting adventures, I really needed to look into my travel.
So I quit heli-ski guiding, sold my giant diesel truck, let my snowmobile rust and looked at different ways to get to the trailhead.
We are constantly reading about electric vehicles being the future – but I was skeptical. EVs have historically had a limited range – which makes them ideal commuter vehicles for urbanites – but useless for someone where I live.
Revelstoke is a small mountain town, deep in the Canadian mountains, 250–400km from major cities. With cold winters and deep snow there are many very valid reasons to be scared of converting to electric. The sacrifices I needed to make seem daunting – but perhaps they are not as big as they seem.
So we had to test it out. My friend Chris Rubens and I went on an electric adventure. Our goal: live our normal adventurous lifestyle while being more sustainable getting from spot to spot.
Chris and Greg on their electric volcano adventure.
I rented a Nissan Leaf from Ecomoto in Vancouver – a commuter vehicle with 100 miles of range. Far from ideal – but if we could drive down the West coast of the USA, climb and ski a bunch of volcanoes and make it back, we could prove to ourselves that electric access is the future.
So first, we met up and climbed and skied Mt Baker, then began our true road trip down south. An app called “Plug and Share” would guide us to all the level 3 chargers, which take around 40 minutes to fully charge the car. This trip was admittedly ideal, since the I-5 corridor that goes south down to Washington, Oregon and into California is littered with these chargers.
It’s not to say we didn’t face challenges. The trailhead for Mt Rainier is quite far inland and well away from any Level 3 chargers. But our app showed us a Level 2 charger that someone had set up at their house for their Tesla. We arrived at the park boundary and started charging at Phil’s personal plug. The percentage slowly moved upwards. We had to hastily leave with barely 70% as the park’s gates were closing. Committed, we drove upwards. As we climbed up to the trailhead our % dropped and dropped. 40%...35% and then finally at 31% we made it. We parked and decided to deal with it when we returned.
Greg charging down a sun-baked volcano.
A great couple of days had us on the 14,400-foot summit and then skiing down a heavily crevassed, but super awesome run. Arriving back at the car we wondered if our first mistake was going to haunt us. Luckily the Leaf has a ‘B” mode which allows the car to slow itself using the engine, putting electricity back into the motor. So as we drove down 5500 feet we brought our charge back up to 50%. A few hours at Phil’s charger and we were off. Yeehaw! Maybe this is going to work!
Mt Hood was our next objective – and there were Level 3 chargers right up to the trailhead. A great summit and silly ski had us driving south. Eventually the ease of charging had us pushing the battery percentage as low as we could go, extending each drive till the % disappeared and the ‘KMs left’ blinked out. We realized there was always extra battery left, and we pushed it many times. Never fully running out of gas – or rather, juice.
Charging, charging... to make it to yet another mountain.
We made it as far south as Mt Shasta in California, where there were less Level 3 chargers and we ended up charging up at RV campgrounds – Level 2 chargers that would take 3-5 hours to fully charge. A couple oddball Canadians, camped amongst the behemoth RVs.
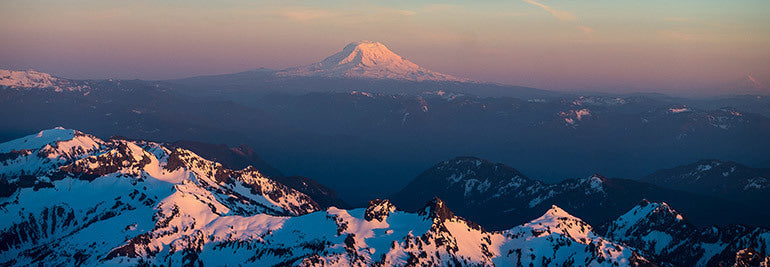
While we drove back north, hitting Mt Adams on the way we pondered our experiment. We ended up traveling almost 5000km, climbed and skied six volcanoes, went rock-climbing five times, had amazing adventures and camped in great places. Essentially: our normal lives, with one major difference. We used one liter of gas during the whole trip: for our cookstove.
Not being able to move quickly between objectives made us more relaxed. Forced stops every few hours had us re-thinking our Type A personalities. To me electric vehicles are the future, especially since climate change would affect our jobs so badly.
My lesson has been learned. Since returning from this trip I have bought an electric Chevrolet Bolt and have fully jumped into the electric vehicle movement. I have dreams of summiting 100 mountains and creating minimal emissions while doing so. It’s a challenge I am calling ‘electric adventures.’ I am 14 summits in, and I have run to some, climbed up others, and skied off those volcanoes. It is a great start and it feels so amazing to be part of the solution to our climate crisis. I will never be perfect – but I can search out ways to be better.
All images © Chris Rubens
Watch "Electric Adventures with Greg Hill and Chris Rubens"now
Press play and follow along on an Electric Adventure
When to use your watch to get you home? Whenever you need it
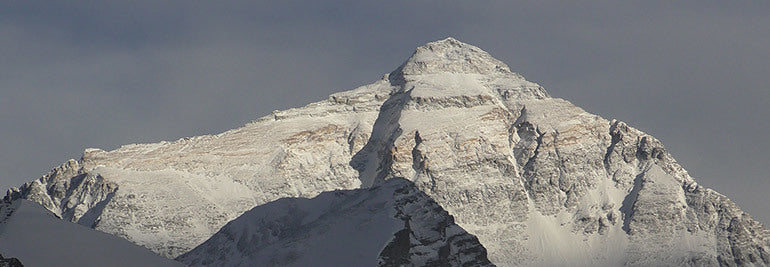
The entire mountaineering world knows Kilian Jornet had not one summit this year on Everest without oxygen, but two. The first of them was record-breaking – a mere 26 hours after leaving the Everest Base Camp at 5,100m. The second was ‘just for fun’ – he was there, he felt good, so, why not do it again?
A lot of things are different at 8,000 m and above. It’s politely referred to as ‘the death zone’ with good reason – people die there, simply because they are there. In the death zone, the human body simply can’t survive for long periods of time. An extended stay without supplementary oxygen will result in deterioration of bodily functions, loss of consciousness, and, ultimately, death.
Getting into it is not a decision to be taken lightly – and getting out of it is imperative. So when record-holding Kilian Jornet lost his way while descending from 8848 m on Everest, his next few decisions would be crucial – his life would literally depend on them.
“Going down from my second ascent on Everest I got lost. It was a heavy snowfall and in the middle of the night and around 8300 m and I was traversing on technical terrain. My brain wasn’t working really well, and I had no clue where I was. Visibility was poor – I could sometimes only see about five meters in front of me – sometimes just two.”
He had left the normal route around 8300 m – and in fact, he is not even sure why. “I have a sort of "black moment" where I can't remember anything. In that time I left the normal route, but I can't remember exactly when or why.” He was clearly suffering the effects of high altitude. And of course, it was snowing: a half a meter during the night, further increasing the difficulty of navigation.
Lucky for him, he had a tool, and the presence of mind to use it: his Suunto GPS watch, which had been recording his path since he left Advanced Base Camp at 6400 m 23 hours ago. Accessing the trackback feature, he realized that he’d made a 90º degree turn to the left, and continued to traverse for one kilometer off of the normal route, and leaving him in the middle of the North Face. It was clear: he had to move in the entirely opposite direction. He did so, until he got back to the normal ridge.
In the new era of fast, light alpinism, going solo has its benefits: you’re quicker, and often, quicker is safer. "I use it about a dozen times in a year,” says Jornet. “When it’s really bad weather or really foggy, if I’m going somewhere with a lot of ridges and cornices – often, it’s really about reducing risk as much as it is about finding the way home.” This brings us to a curious realization – it’s not a last-ditch, all-odds-are-against us survival tool – it’s something to keep you from getting into that situation entirely.
That said, Jornet recognizes clearly the severe potential consequences of his situation on Everest. Without Trackback, he likely would have hunkered down in the cold for four or five more hours until daylight – and the consequences of that could have been severe. “There’s no question for me,” he says. “This feature saves lives. For sure.”
Learn how to navigate with Suunto Spartan watches or how to use Trackback on Suunto Ambit watches.
Yes, you can use your Suunto in the mountains for ten straight days
It’s no secret that for years I have been addicted to recording my adventures. It started out in the pre-tech era with my first ski traverse in 2001. A 5-day loop through the mountains where we skinned and skied our way around the Hurley Horseshoe traverse. Afterwards, I remember taking a pencil and reliving our traverse by drawing in our up and downs, our summits and creek crossings.
The habit grew on me. It got to the point where I had maps tacked up on my walls with lines drawn all over them. My documentation led me to go to where there were no lines and I would explore all day and return to fill in the blanks.
When Suunto came out with the Ambit my addiction evolved. All of the sudden my pencil lines on flat maps became 3D lines laid over satellite images. I could go on a wild excursion, come home and place a line onto mountaintops and down steep ski descents. My adventures became more interactive and ‘lived’ online. Since then I have always imported all my lines, from Norway to Pakistan to remote Canadian mountaintops – and now I can see all my efforts overlaying the world. It’s truly amazing.
Since that first ski traverse in 2001, I have done 10 multi-day traverses – up to 21 days long – but my last was in 2009.
This year as we prepared for a 10-day trip I wondered: would I be able to use my watch to log every day? We hoped to be completely self-sufficient – every gram added to the 20+ kilos of weight on our backs. I would not bring anything extra. Which meant that I did not want to bring a solar charger or battery pack for my Suunto Spartan Ultra.
Of course, I wanted to have this entire expedition logged – but would the watch really last long enough? With a few tweaks to settings, I could theoretically give the watch enough battery for 65 hours of skinning and shredding. Well… maybe not shredding, since our bags did weight a lot.
We started the trip on April 16th and hitchhiked our way to the start. I woke up sick, with low energy, but the wheels were in motion and I felt like I could not let the team down.
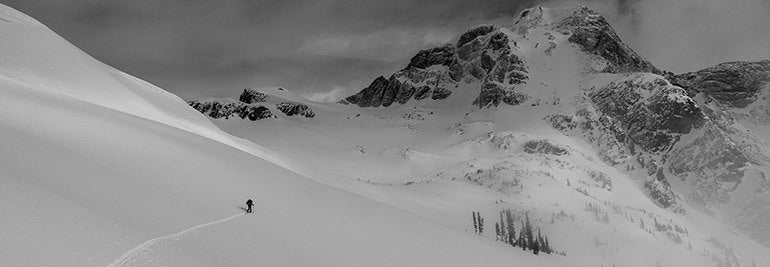
The Monashee traverse is a ski tour through the rugged Columbia mountains that sit to the west of Revelstoke. Once you get it, there are no ski lifts, no towns – just one cabin and a 100 km of skiing from South to North. It is not particularly remote, but it is challenging. With mountains peaking around 3000m, huge granite walls and heavily glaciated terrain, success was never guaranteed.
For the first four days the weather was stormy, and the avalanche hazard went really high. This was the most challenging terrain to negotiate but as luck would have it our bigger descents, and more committing ascents, had already slid – the only reason we were able to move through this complex terrain.
Ski traverses have a simplicity to them that is very rewarding. Each day the challenges are simple, eat, travel through complex unknown terrain, stay safe, eat, drop the big bags and ski a little, find a great place to camp, eat, sleep and repeat. Daily new views are seen and appreciated.
We fell into a routine and moved endlessly north. Most of our challenges were weather based and we persevered forwards. On the day of our lowest morale, we also experienced our best sunset and northern lights, which rejuvenated our excitement and desire to dig deep and push forward.
7 days in and my watch was still recording each day. But with 3 days to go and 30% battery power I wondered – would it last?
Finally, the weather got better and we managed a couple of great ski lines. Chris Rubens got a great line in the alpenglow on Mt Mulvahill.
10 days of touring finally had us boot packing up Mt Begbie, Revelstoke’s signature mountain. The watch was still going and we were all exhausted and excited to be finishing off with this summit.
All-in-all we ski toured 100km, including 10,000m of ups and downs, and over 68 hours of logged lines. The watch made it through. Was it all worth it? I think Chris’s last turns answer that question.
All images © Greg Hill and Chris Rubens
How do you train, Kilian Jornet?
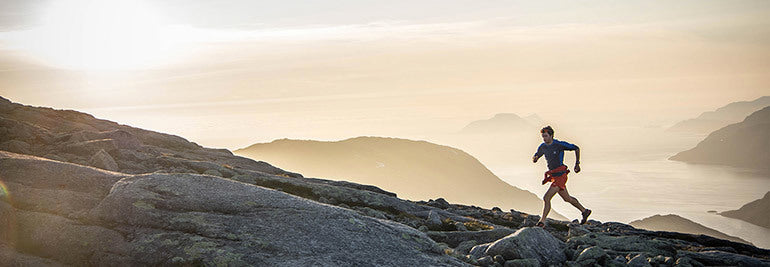
Kilian Jornet has spent a lot of time in the mountains since he was a kid and has been training to improve since he was a teenager. All the hours, days and years of training have made him one of the best all mountain athletes ever. Whether running, skiing or climbing Kilian is breaking records, winning races and inspiring others.
Kilian, in the video you say: “If you don’t have pleasure when you train, you will never improve!” What makes training fun for you?
You don’t train to have fun but to improve, to reach goals or to adapt, but it is important to have pleasure doing the activity you do to spend this amount of time easily. I love to ski and run and to be in the mountains and I’m enjoying when I do that and it is part of my training.
How do you turn tough days into good ones?
Some days you just switch to work mode, listen to music in your headphones and watch the watch count the time and meters you need to do that day. Sometimes it’s more hard than fun but it is important to do. A good or bad day is not fun or not fun. Some training session can be hard and fun, fun but not hard, hard and not fun or not fun and not hard. Good or bad depends on what you have improved or learned, what have you experienced.
How has your training changed over the last 10 years?
Not much in big lines, I like the principles of training I do, like quantity over quality and specific training. They seem to work for me. I try to be open and look at new ways to train and test different things.
How is it possible to be fast from short races, like a vertical km, to super long ultras?
Train different situations, train some long days, some short. It does demand a lot of time (years) and time (hours a year) to do all different kind of training.
What are your strengths?
In physical capacities, recovery rate and VO2 max. Then psychologically I can enter a non-emotional state that helps me in stress situations. Now also my experience.
What would you still like to improve?
Many things. It’s important to work to improve both the weaknesses and the strengths.
What are you focusing on this year?
Mostly rehab and recovery from my shoulder surgery that I had in October. Then I’ll see how it goes. I had a ski fall some years ago and dislocated both of my shoulders. Since then I have dislocated them several times and knew I needed to get the operation done at some point.
I don’t really focus but try to be in good shape on average and adapt depending on the next goal that can be a long or short ski mountaineering or trail running race or mountaineering.
What motivates you to keep pushing your limits?
I just think it is great to know yourself.
Watch Kilian's video "How do I train (again and again)"
Kilian Jornet started training the day he was born. The mountains were his playground and without realizing it he created his own training philosophy that is based on repeating, trying and failing. Watch Kilian’s How do I train now!
Figure out your training zones and supercharge your fitness
Key components to improve your fitness are frequency, duration and intensity. Frequency and duration are easy to understand, but training intensity is a bit more tricky. How hard is hard? And why should I care? Read on to learn about intensity zones and about defining them.
That Janne Kallio works at Suunto on new product and solution concepts shouldn’t surprise anyone – after all, triathlon is his passion. Neither are we surprised that his book (Treenaa tehokkaasti, currently only available in Finnish) can help you learn to how to use technology to improve your endurance results. But the most surprising thing? Using training zones is easy. “Training does not need to be complicated,” says Kallio.
“The key aspect of reaching progress in one’s fitness is the ability to increase the physical load over longer period of time. Research shows that for people who are only starting to train, the easiest way to progress is to simply add one more training session in the week. Running three times a week versus two will improve fitness.”
But after a certain limit, simply running more is not enough.
“Running speed increases quite linearly on all distances up to about 60–70 km per week. After that the correlation isn’t as strong. When training more than 100 km a week your running speed does not necessarily get any faster.”
What Kallio is explaining is that adding volume to your training only helps up to a certain point. After that getting faster requires focus on other things, like the correct distribution of training intensity.
“Quite common training model is the so called polarized model where a big chunk, i.e. 80 % of training, is done aerobically, and a small portion of training with high-intensity. In order to follow this type of model one needs to be aware of one’s intensity levels.”
But what does intensity actually mean?
Training on different intensities stresses your body in different ways and leads to different kind of physiological adaptation. During light or moderate efforts the energy is supplied by the oxidative system, burning fat and carbs, and your blood lactate levels remain the same as at rest (0,8–1,5 mmol/L).
As the intensity increases, lactic acid starts to build in your muscles. Your body is still able to flush it out but the lactate levels rise above your resting levels. In training terminology this is your aerobic threshold (usually marked at 1,5–2,0 mmol/L).
If the intensity of the exercise intensifies even further, at some point your cardiovascular system can’t supply your muscles with enough oxygen, and lactic acid starts to build in your muscles faster than it can be removed. This point is called your anaerobic threshold (usually at around 4,0 mmol/L).
Based on these values, five zones are defined. Zones 1 and 2 are below aerobic threshold. Zones 3 and 4 between aerobic and anaerobic thresholds. Zone 5 is above your aerobic threshold. (Some of the zone-based models split zone 5 to fit dedicated sprint / explosive training into this intensity.)
Zone 1 is for recovery and warm-ups/cool-downs, zone 2 for long endurance sessions, zone 3 for tempo work, zone 4 for high-intensity intervals and zone 5 for maximal, VO2 max efforts.
The intensity zones are commonly defined based on heart rate, running pace or cycling power. Depending of the personal preference, type of training and equipment available one can use any of these models in their training.
How to define your personal heart rate zones?
It is important to know your zones to be able to follow a training plan and to keep structure in your training. “Without this knowledge easy runs often become too hard and hard ones are not hard enough. Zones help you understand and commit to what you are supposed to do,” Janne Kallio says.
There are basically three ways to define your heart rate zones: an estimate based on your max heart rate, a field test and a lab test.
Says Janne: “Statistically an estimate based on your max heart rate is valid, but as we know, individual differences are large especially in anaerobic threshold. The first challenge is the estimation of maximum heart rate and then the percentage of this to set the right level for anaerobic threshold. The percentage is an estimation as well.”
“The estimation of maximal heart rate is a good starting point. After some really hard workouts it’s definitely good to update your maximum heart rate based on personal experience. But for a goal oriented athlete, more accurate values are needed.”
The best way to get to know your personal HR zones is to take a VO2 max test with blood lactate analyses at a lab. But that is not necessary for every athlete. You can get a good idea of your personal intensity zones with a fairly straight-forward field test: After a good warm-up, run a 30-minute, race-pace effort. 10 minutes into the test hit the lap button on your Suunto. After the test use the average heart rate of the 20-minute lap as your anaerobic threshold.
Run hard the entire half an hour, but don’t start out too hard. After doing this test a few times you will learn to pace it better.
“After you have got your anaerobic threshold, it is time to make some calculations. There is some published research done on where the aerobic level fits based on anaerobic threshold,” says Janne. “It’s good to understand that an accurate anaerobic threshold is the basis of good zone distribution.”
Zone 5: Above your anaerobic threshold. Zone 5 ends at your max heart rateZone 4: 94–99 % of your anaerobic threshold. The upper limit of zone 4 is your anaerobic thresholdZone 3: 89-93 % of your anaerobic thresholdZone 2: 83-88 % of your anaerobic threshold. The upper limit of zone 2 is your aerobic thresholdZone 1: <82 % of your anaerobic threshold. Zone 1 starts at your resting heart rate.
Note, these % values are from anaerobic threshold heart rate, not from maximal heart rate.
There are also other zone models that you can use. For example some of the zone models place your anaerobic threshold within zone 4 and in some models zone 1 does not start at rest heart rate but above it at 55 % of maximum heart rate.
Kallio says that’s not really important – it’s about the concept: “What one needs to understand is that the role of the zones is to ensure you train in different intensities.”
Different activities, different intensity zones
“It is also good to know that your heart rate zones differ slightly in different endurance sports. Activities where more muscles are working also require more oxygen meaning your anaerobic threshold is higher in these sports. You will reach your anaerobic threshold earlier in swimming than in cycling, running or cross-country skiing – in this order,” Janne reminds us. “So if you are, let’s say, a cyclist and a runner, you should test and define your zones for each of the sports to target your training intensities correctly.”
It’s just one example of how a little knowledge can help out a lot – a whole lot.
LEARN HOW TO USE SUUNTO VERTICAL'S INTENSITY ZONES
Main image © Philipp Reiter
